
Tag Archives for " WordPress website "

Best WordPress Plugins
The best WordPress plugins make your site faster, increase traffic, and tighten website security for your visitors.
But you don’t want to overdo it.
Installing too many WordPress plugins can actually slow down your site.
Using certain plugins together can cause conflicts that you definitely want to avoid.

Disclosure: This content is reader-supported, which means if you click on some of our links that we may earn a commission.
I’ve got a good number of plugins on my blog, which gets millions of visitors each year.
You can fill out forms, sign up for membership content, and more–everything runs smooth.
It’s all about picking the right plugins that work together for your needs.
7 Best WordPress Plugins
I’ve put together a list of the seven best WordPress plugins you can install right now to improve your site.
After the reviews, I’ll show you how to evaluate your options and avoid issues.
#1 – WP Rocket Review – The Best for Speed Optimization
A WordPress site can put a lot of strain on your server, which increases the possibility of crashing your web server.
To avoid such unfortunate situations and ensure all your site loads super fast, you need a caching plugin like WP Rocket.
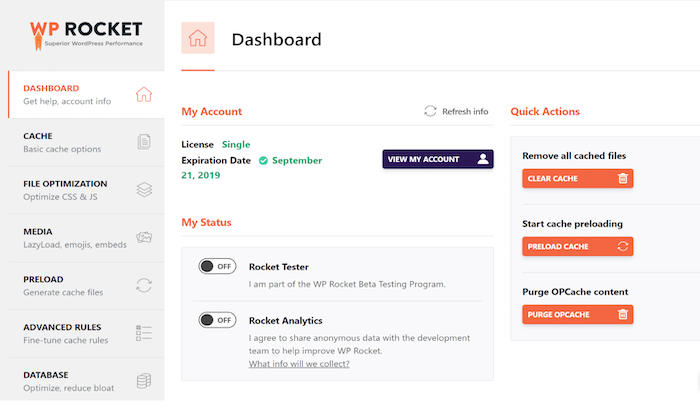
WP Rocket is a simple and effective plugin designed to boost your website speed and performance.
It doesn’t wait for someone to request a page to save it to cache.
Instead, it automatically builds your website cache, resulting in an immediate performance boost.
The plugin turns on recommended WordPress caching settings, such as page cache, gzip compression, and cache pre-loading automatically.
You can also activate other features like CDN support, lazy loading images, DNS prefetching, and minification to improve your page loading time and reduce bounce rate.
Starting at $49 for an annual license per site, WP Rocket is less than $5 a month.
There are solid WordPress cache plugins available, but WP Rocket is still my number one pick in the category.
It’s easier to use than some of the less expensive ones, which is probably why it is so popular.
There is no free trial, but WP Rocket does have a 14-day refund policy.
So you can try it risk-free to see how it impacts your site’s performance. Learn more.
#2 – Yoast SEO Review – The Best for Increasing Organic Website Traffic
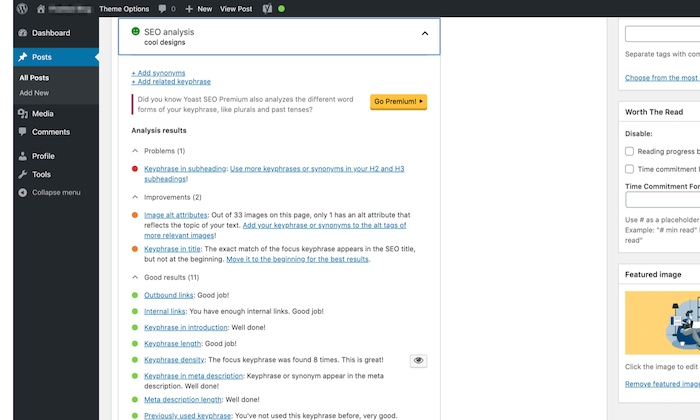
Users serious about search optimization trust Yoast SEO to reach their goals.
All you need to do is select a keyword, and the tool will then optimize your page around it.
Not only does it help you improve SEO, but it also analyzes your content readability.
It gives you real-time page analysis to optimize your content, images, meta descriptions, titles, and keywords.
No wonder it might be the most popular SEO tool in the WordPress plugin repository.
Further, Yoast checks the length of your sentences and paragraphs, whether you’re using enough transition words or subheadings, how often you use passive voice, and so on.
It tells Google whether or not to index a page or a set of pages too.
Although there’s a free version available, you can upgrade to the premium version for $89 per year that comes with extra functions, allowing you to optimize your content up to five keywords, among other benefits.
#3 – Akismet Review – The Best for Spam Protection
Nobody appreciates the opinions of bots.
Unfortunately, spam comments are an unavoidable price of website success.
With Akismet, though, you’ll be able to eliminate spam comments–no matter how genuine they look–effectively and effortlessly.
After all, it’s the official anti-spam plugin developed by Automattic, the parent company of WordPress.
There’s a possibility of the plugin missing out on a few spam comments or not identifying false positives.
You only need to tell it about them, and the plugin learns and gets better over time.
The plugin also checks your contact form submissions against its global spam database to weed out unnecessary and fake information.
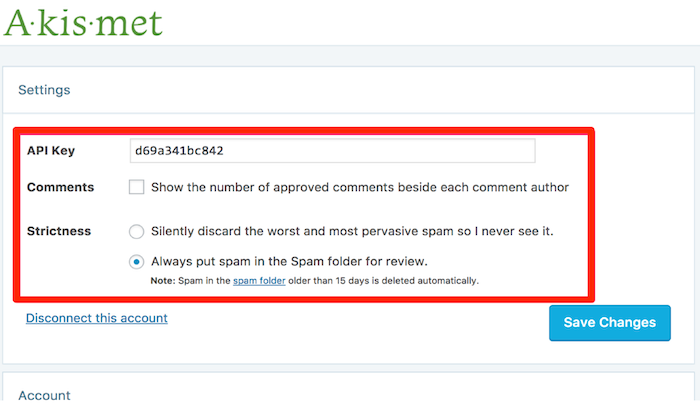
Although free to download, you will need an Akismet.com API key to use the plug-in.
These keys are free for personal blogs, but businesses and commercial sites will have to opt for paid subscriptions.
#4 – Wordfence Security Review – The Best to Handle Security Concerns
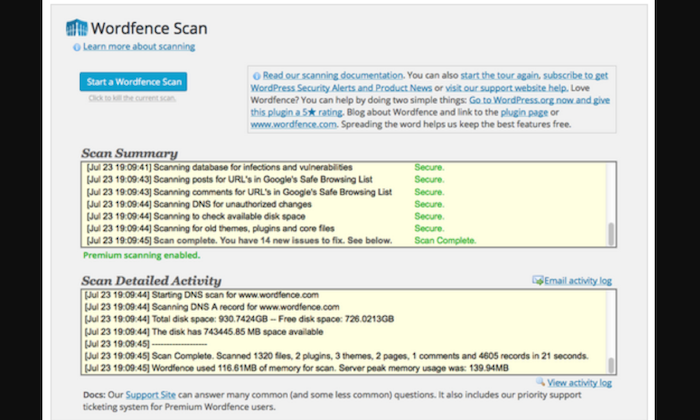
Wordfence Security is a WordPress firewall and security scanner plugin.
It offers your site full protection from malicious hackers, malware, spam, and other online threats.
It searches for malware and compares code, theme, and plugin files with the records in the WordPress.org repository, allowing it to verify its integrity and report any changes to you.
The plugin comes fitted with a web application firewall (WAF) called Threat Defense Feed that helps Wordfence identify and block malicious traffic.
Plus, it prevents brute force attacks by ensuring you set stronger passwords and limiting login attempts.
Wordfence firewall and security scanner will give you security risk alerts before your website is hacked, keeping it safe and secure.
It also comes with login security features that enable you to activate reCAPTCHA and two-factor authentication on your website.
A free version of Wordfence is available.
But you can also buy the premium plan at $99 per year to get extra security features like the real-time IP blacklist and country blocking option, along with support from professional support engineers.
#5 – UpdraftPlus Review – The Best for Site Backup
Many people fail to consider the importance of having a backup plugin.
Don’t make that mistake.
Thousands of sites get hacked daily.
WordPress sites are a really common target for hackers because it is so popular and a lot of non-technical folks use it.
Simply hoping you won’t be next on the list is just wishful thinking.
You have to be prepared, which is where backup plugins come in handy.
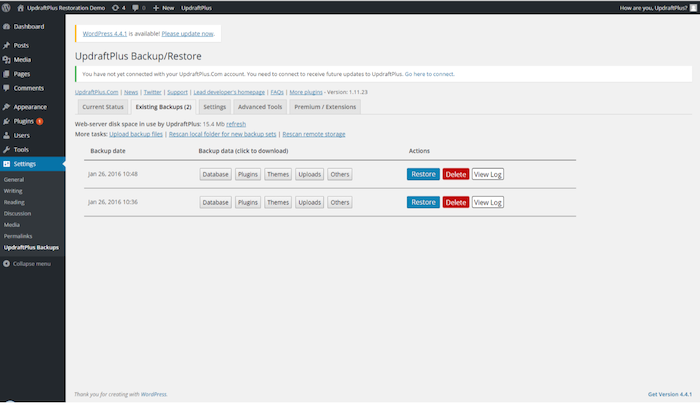
There are plenty of WordPress backup plugins online, but only a few are as powerful and user-friendly as UpdraftPlus.
It allows you to set up automatic backups and store your files on a remote location like Google Drive, FTP, email, and Dropbox.
Restoring your website from a backup is also super easy and can be done straight from the dashboard.
Other features include advanced reporting, database encryption, additional storage destinations like OneDrive, Azure, SFTP, and backup scheduling.
You have the option to either use the base version of UpdraftPlus or purchase its premium version that costs between $195-$399 a year, depending on the plan you choose.
#6 – MonsterInsights Review – The Best for Data Tracking
Data tracking is crucial for scaling and improving your website.
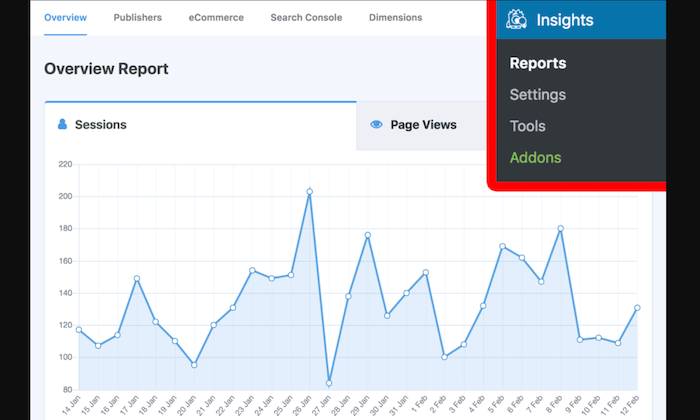
Without facts, all you’ll have are assumptions. MonsterInsights allows you to add, customize, and manage your Google Analytics-related web tracking services–all within your WordPress dashboard.
Google Analytics helps you improve your website, content, and better user experience by giving you key insights about how every webpage performs and which online campaigns bring in the most traffic and conversions.
Some of you may have heard of Google Analytics for WordPress.
It was the former name for MonsterInsights.
The name might’ve changed, but the purpose remains the same.
You can use it to view active sessions, conversion and bounce rate statistics, and keep track of outbound and internal links and downloads.
Other details like your total revenue, top products, and top referral sources will also be included.
With all the information readily available, you can work on creating a data-driven strategy to grow your business.
MonsterInsights has a free version that allows you to install Google Analytics, track data, see metrics on the dashboard, and run reports.
There is also a premium version that is more of an investment but includes post and page tracking, custom tracking and reports, AdSense tracking, and more.
The premium version starts at $99.50 per year with the Plus plan.
#7 – WPForms Review – The Best for Designing Contact Forms
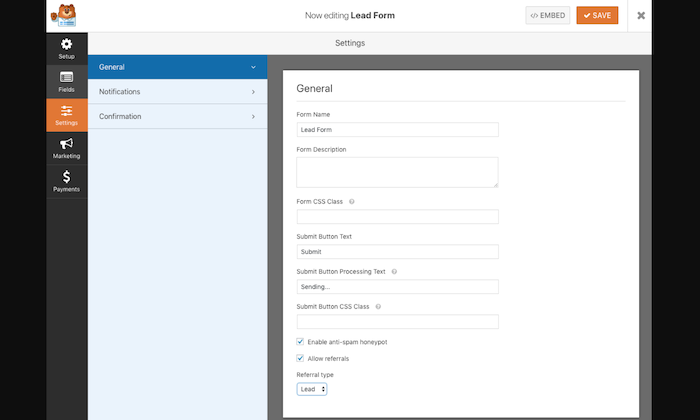
You can use WPForms to create appealing and highly-effective contact forms rather quickly, thanks to its drag-and-drop builder.
It comes with several cool features like smart conditional logic to ensure your visitors have an excellent customer experience, which, in turn, increases the chances of them submitting their contact information.
Moreover, WPForms can integrate with all popular marketing and payment platforms.
The free plan lets you create a secure contact form with ease.
But if you want access to more templates and advanced features to boost your lead generation efforts, the paid version would be more appropriate. The paid version starts at $39.50 per year for one site.
What I Looked at to Find the Best WordPress Plugin
I’ve compiled a list of a few factors you should consider to narrow down your search to determine the right fit for your website.
Every plugin’s page on the WordPress Plugin Repository contains detailed information about the plugin, its purpose, how to use it, and more.
Refer to this information to decide whether a specific plugin is a good fit for you.
Search the plugin directory and pick a few options you think will suit your needs best.
When it comes to making the final selection, use my tips below:
Free vs. Premium
We all like free things, but that doesn’t necessarily mean they’re better.
WordPress plugins are no exception.
Free plugins can be great if you don’t want to spend money right away, and most of them are enough to get the basic job done.
However, if you’re looking for more features or higher customization, most plugins will need to be upgraded to the premium version to unlock more features.
Contrarily, premium plugins are designed to ensure compatibility with new WordPress versions and provide better security.
On top of this, you get a more comprehensive selection of features to customize and enhance your site.
If monetary commitment is something you’re worried about, you’ll be pleased to know that most premium plugins are quite affordable.
So you won’t be breaking the bank anytime soon.
In the end, it’s your call. Just make sure you make the right choice for the functionality of your site.
Overall Plugin Ratings
The overall rating of a WordPress plugin can tell you a lot.
Previous users can rate a plugin up to five stars based on their experience.
Skip options that don’t have an average of at least (or almost) four stars.
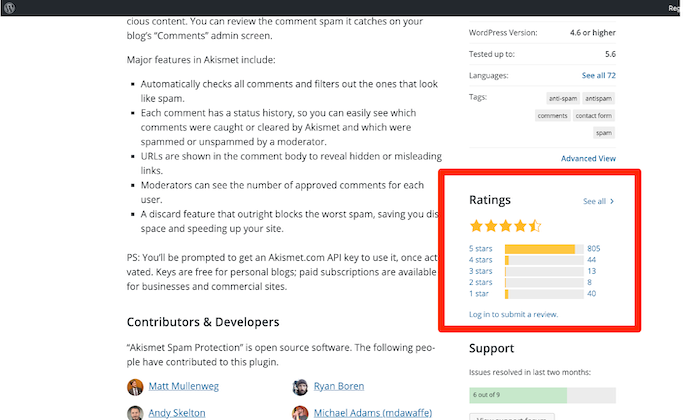
Plugins with a one-star, two-star, or three-star rating are mostly glitchy and create a lot of problems.
Whereas higher-rated plugins are well maintained, work well, and offer adequate support.
Otherwise, why would any user give them good ratings and reviews?
Go Through As Many User Reviews You Can
There’s no better way to determine the quality of a plugin than directly from users. This way, you know precisely whether a plugin is successful.
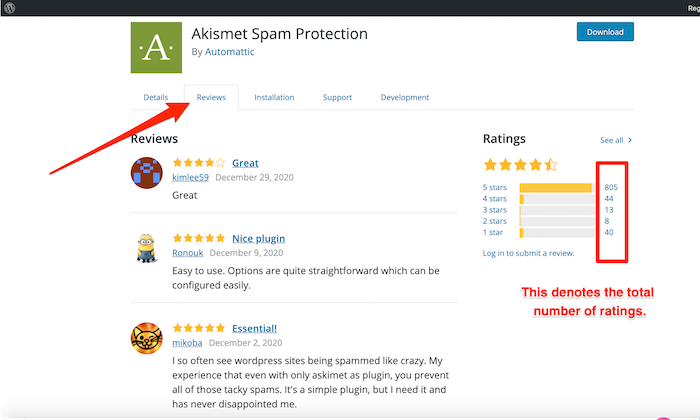
I would also recommend looking at the total number of ratings.
For instance, if a plugin has only been rated by five or seven people, it means it’s relatively new.
If they give a decent review, the average rating will automatically be higher.
It’s always better to download plugins with more users and reviewers.
So, not only should you read the user reviews, but also check the total number of reviews.
See How Active the Support Section Is
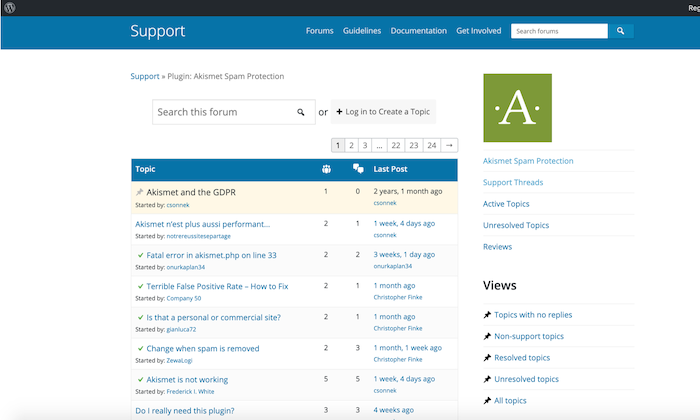
Every plugin on the WordPress plugin repository has a support forum.
Go through the support tab to check out the level of activity within these forums.
Regular activity is necessary as it indicates the developer is responsive and wants to deliver an excellent experience to its users by solving user-reported issues.
If you’re evaluating a premium plugin, their official website should be your go-to instead of the support tab.
Find out how easy it is to get support and whether it has the features you need.
Send a test email to see how fast the developers respond to check out their efficiency.
If a plugin has several unresolved threads or you don’t get an answer to your test email, it probably means the plugin is abandoned or that developers are not responding to user issues.
It could still work, yes. But you won’t get adequate support if you face problems.
Find Out the Frequency of Updates
The best plugins are updated regularly. If not, or if it has been a long time since their last update, they may not be well-maintained.
Of course, there can be some exceptions, but regular updates are still an important consideration.
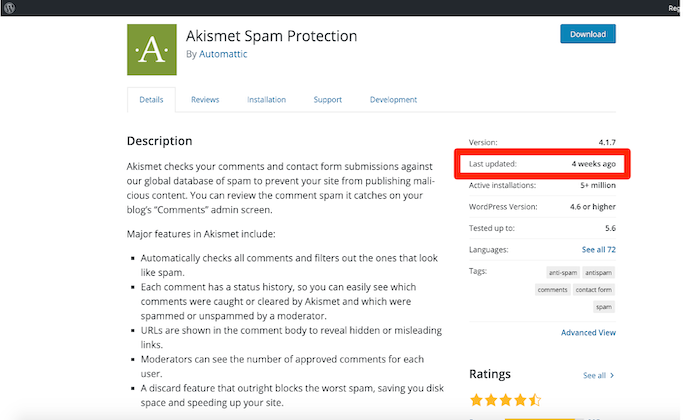
Ideally, plugin updates should be in line with WordPress’ core updates.
This ensures optimal compatibility and a good level of active implication from the plugin developer.
You can check exactly when a plugin was last updated by visiting the WordPress plugin repository.
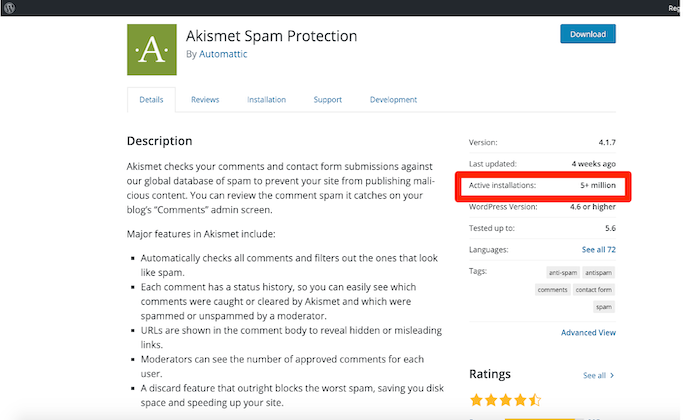
Also, check out the Active Installations section.
This will give you an idea of the plugin’s popularity and whether it’s still relevant to the ever-changing market trends.
Conclusion
WordPress plugins can do it all, from designing and maintaining a website to optimizing it for search engines to enhance user experience.
Get started today with my top recommendations.
These are trusted products that can help you take your site to the next level.
Here’s the full list to recap:
- WP Rocket – The best for speed optimization
- Yoast SEO – The best for increasing organic website traffic
- Akismet – The best for spam protection
- Wordfence Security – The best to handle security concerns
- UpdraftPlus – The best for site backup
- MonsterInsights – The best for data tracking
- WPForms – The best for designing contact forms
Use Yoast to keep your SEO on point, and block spam and bots with Akismet.
Next, make sure your WordPress security remains uncompromised with Wordfence.
WP Rocket keeps loading times short, while UpdraftPlus can come to your rescue when you face compatibility issues or want to migrate your site.
Got a favorite plugin that I didn’t mention?
Comment below to let me know!
Source: feedproxy.google.com

Everything You Need to Know About Inserting and Editing Images in WordPress
Do you feel confident using images in your blog posts? While there’s no absolute rule that bloggers need to include images, most bloggers will include at least one eye-catching image in each post (normally at or very near the start).

However, it’s easy to make mistakes with images. We’ve already covered how to obtain images legally so you don’t accidentally infringe on someone’s copyright.
But in today’s post, I want to go through the process of uploading and inserting images.
Whether you’ve just started blogging or you’ve been blogging for years, I hope you’ll learn something new from today’s post.
We’re going to start off with the basics, and move on to some more advanced tips and tricks.
Here are the ten things we’re going to cover:
- How to download an image from the web
- How to upload an image to your blog
- How to insert an image into your post
- How to align your image within your post
- How to resize your image
- How to turn your image into a link
- How to add alt text to your image
- How to edit your image in WordPress itself
- How to keep your image file sizes low
- How to optimize images for retina screens
10 Things to Know About Inserting and Editing Images in WordPress
#1: How to Download an Image from the Web
Brand new bloggers might feel a bit stuck at the first hurdle: downloading their chosen image.
Once you’ve found an image you can legally use, you’ll need to download it to your computer.
(While it’s technically possible to insert it in your post using its existing URL on the web, this “hotlinking” is a bad idea. Many sites don’t like it, as it puts extra strain on their servers. And if the image file is removed from its current location, it’ll disappear from your post too.)
To download an image, right-click on it. You should see an option such as “Save image as…”. (It may be worded slightly differently depending on your browser.)

Click on “Save image as…”, and then select the folder on your computer where you want to save it.
On sites that act as a library of images (such as Pixabay and Flickr), you’ll normally be able to choose from different sizes for the image. Here’s how it looks on Pixabay.

The numbers on the left are the dimensions of each image in pixels (width by height). The numbers on the right are the size of each image file in kB/MB. As you can see, larger images equal much larger files.
It’s up to you what size you choose. (We’ll cover this in more detail in sections #9 and #10 on this list.) Note that on Pixabay you need to create a (free) account to download the largest images.
#2: How to Upload an Image to Your Blog
After you’ve selected and downloaded an image, you need to upload it to your blog.
On WordPress, log in to your dashboard, open up your chosen post (or start a new one), and click the “Add Media” button.

Then click the “Upload Files” tab. You can either drag and drop your chosen file to upload it to your blog, or click the “Select Files” button to browse through your computer folders for it.
(Note that whichever you choose, the original file will remain on your computer. Only a copy of it is uploaded.)
If you want to, you can upload several images at once.
#3: How to Insert an Image
First, position your cursor where you want to put the image within your post. (Click at the start or end of a line of text, or click on a blank line.)
Your uploaded images are available in your media library. Click “Add Media” then the “Media Library” tab (if it’s not already selected for you) and you’ll see them.

To insert an image, click on it and you’ll see this panel on the right-hand side of your screen.

You can set the alignment of the image, add a link, and choose the size you want it to be displayed. We’ll be covering all of these later on in this post. (You can edit your image to change any of these details after inserting it.)
Click “Insert into post” to place the image in your post where your cursor is.
#4: How to Align Your Image Within Your Post
If you inserted your image without changing the alignment setting, it may not appear exactly the way you wanted.
Perhaps you intended to have it above your text, centered, or at the start of your post. But instead, it’s right-aligned alongside the text.

(Dummy text generated by fillerama on “Doctor Who” mode.)
To re-align your image, click on it and then click the “align center” button on the mini-menu that pops up.

(You can also click the little pencil button to edit the image, where you can select the alignment, size, and more.)
Your image should now be aligned correctly in your post.
#5: How to Resize Your Image
If your image is too big, you can resize it by clicking on it and then clicking on the edit button in the mini-menu.
You’ll see details about the image. Click the dropdown menu next to “Size” and you’ll see a range of options.

If one of the listed sizes works for you, select it. If not, click “Custom Size” and enter a width or height for your image in pixels.
Whichever you choose, the other dimension will be adjusted automatically.

Click the “Update” button at the bottom of the screen, and you’ll be returned to your post with the image updated to your chosen size.
Note that this process doesn’t change the size of your original uploaded image, so the file size will remain the same. (We’ll cover more on this later in this post.)
#6: How to Turn Your Image into a Link
At some point, you’ll almost certainly want to create an image that readers can click on to go to a different page.
For instance, you might want to create:
- A “start here” page showing the featured image from several posts, with each image linking to the appropriate post
- A page of book reviews, with the cover image for each book linking to the book on Amazon
- A custom “buy” button for your products, with each one linking to a PayPal or shopping cart page
To add a link to your image, click on the image and then click the little “edit” button that appears to get the Image Details screen.
Click the “Link To” dropdown and select “Custom URL”. You can then enter whatever URL you want the image to link to.

Make sure you click the “Update” button to save your changes to the image.
An even quicker way to add a link to an image is to copy your link, then click on the image and paste the link (press Ctrl+V on a PC or Command+V on a Mac). This will automatically add the link to the image.
#7: How to Add Alt Text to Your Image
Alt (alternative) text is normally used for accessibility. It provides a short description of your image that can be read to people using screen-reading software.
(It will also appear on the screen as text if the image fails to load.)
Note that this is different from a caption. If you enter a caption, it’ll be displayed immediately beneath the image in your post.
You can add alt text to your image when you’re editing it. Simply fill in the Alternative Text field with whatever text you want.

#8: How to Edit Your Image in WordPress Itself
It’s normally best to edit images before you upload them using software such as Photoshop (or if you want a free alternative, Gimp or Paint.NET).
But sometimes you might want to make adjustments to your original image within WordPress. You can do this by clicking the “Edit Original” button in the Image Details panel.
You’ll then see this screen.

You can then resize the image. (You can only scale down, not up.)
Note: it’s best to do this before making any other edits.
You can also rotate the image, or flip it from top to bottom or left to right, using the buttons immediately above it.
You can crop the image by clicking on it and dragging it to select your chosen area. Here’s the original image flipped left to right, with an area selected so it can be cropped.

To crop the image, you then need to click the “crop” button on the top left above the image.
Once you’re happy with your changes to your image, click “Save” beneath it, then “Update” on the next screen. You should now see your new image in the post itself.
If anything goes wrong, you can restore your original image using the “Restore Original Image” option.

#9: How to Keep Your Image File Sizes Low
The larger your image files, the longer they’ll take to load on your web page. And this can potentially affect your site’s performance. If your site is really slow to load, readers may simply give up and go elsewhere.
There are several ways you can keep file sizes down, including:
- Using .jpg images where possible. They’re compressed, so they aren’t as high quality as other file types. But for images in regular blog posts, they’ll probably look fine. Note that if you have transparent (or partially transparent) images, though, you can’t save them in .jpg format.
- Resizing your image before uploading it to WordPress. If you’ve taken a photo on your camera and it’s 4000px wide, don’t upload it unedited to your blog. Yes, you can scale it down in your post (see #5), but the image will still take a long time to load. Instead, use image-editing software to resize the photo before you upload it into your media library.
- Using the WordPress plugin Smush to resize and optimize images you’ve already uploaded in the past. This could make your site significantly faster.
- Using the TinyPNG service and/or Compress JPEG and PNG images plugin to reduce the size of your .png images. (If you have partially transparent images, they’re probably .png files. You should also use .png for any files with graphics in them.)
#10: How to Optimise Images for Retina Screens
The newest Apple products have Retina displays, which have a higher pixel-per-inch density than regular screens.
Retina has four times more pixels than standard screens. If you have a 400 x 300 image (120,000 pixels), you’d need to use an 800 x 600 alternative (480,000 pixels) to render it well on a high-density display.
This means that if you want a 500px by 330px image for your post, it would be best to upload it as a 1000px by 660px image. That way, it can be displayed crisply on the retina screen.
Your theme might automatically size and display the image correctly for each user (based on their device) if you simply insert it into the post at the larger size.
If it doesn’t, you can use the WP Retina 2x plugin (which is explained in detail by Barn2 Media) to create and show the retina images as appropriate.
I know there’s been a lot to take in with this post. Don’t worry: you don’t have to master everything at once.
If you’re new to blogging, you might simply want to get confident with the basics of downloading and uploading images to your blog, then inserting them into your post at the appropriate point.
But if you’ve been blogging for quite a while, you’ve hopefully picked up a new tip or trick today as well. How will you put it into practice this week?
The post Everything You Need to Know About Inserting and Editing Images in WordPress appeared first on ProBlogger.


Source: feeds.feedblitz.com